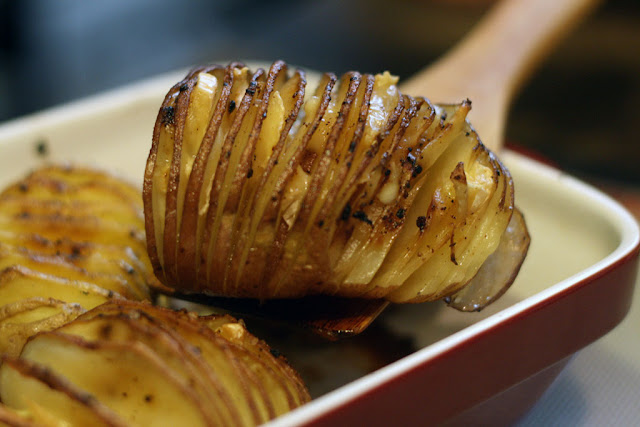
Reverse Sear Pork Loin

Pork loin is a dinner staple at our place. It's easy to make and can be a part of a more upscale meal or just a regular day meal. Best of all pork loins are pretty cost-effective. The "secret" is to take your time in baking the pork loin. Depending on the thickness of the pork loin it can take between 60 minutes to almost 1 hour and 45 minutes for the initial bake. This is because we bake the loin at a low temperature (250F). The low temperature slowly cooks the pork and retains all the natural "juices" so that you're left with a tender and juicy pork. You then finish the pork using the broil setting of your oven for about 10 minutes so you have a crispy flavourful top. This method is called a "reverse sear" and runs counter to the recipes that call for you to initially sear the meat and then bake it at lower temperatures. The conventional searing/browning method leads to tough and dry meat.

Over the past few years, Dan has compared the two methods and found that for the same size of meat the conventional searing/browning method "saves" you only about 30 minutes but at the very high likelihood of overcooking your meat. The reverse sear method slowly renders the fat and gives the pork flavour!
The recipe is all about preparation as the the oven does most of the work. Using a meat thermometer is key to cooking the meat to the correct temperature. I have sliced and scored the fat layer many times and can tell you that after the first time it gets much easier! Compared to spatchcocking a chicken this could eventually be like a "walk in the park".
Ingredients for Reverse Seared Pork Loin
- Pork Loin (2kg / 5lb) - pick a loin that has an even layer of white fat along the length of the loin.
- Coarse Salt
- White Ground Pepper
- Baking Powder
- Seasoning (optional)
Directions for Reverse Seared Pork Loin
- Drain and pat dry the pork loin with paper towel. The pork loin should be dry to the touch (a paper towel should not pick up any moisture).
- With your sharpest knife, score the fat layer in a small criss-cross pattern. Try to score the fat layer until it reaches the meat layer.
- With some butcher's string tie up the loin at about 7-8 cm (around 3 inches) sections. This makes the loin more even so that baking is more predictable. Once tied up, the scored fat layer should flare out a bit like a pineapple.
- Sprinkle coarse salt across the loin. We use about 2-3 teaspoons of coarse sea salt for about 30 cm in length of loin (11-12 inches). You want to be able to see the salt end up between the scored channels of fat.
- Sprinkle 1/4 teaspoon white ground pepper (while optional, we really like it on the pork)
- Sprinkle a few pinches of baking powder.
- OPTIONAL - we sometimes sprinkle about 1/2 teaspoon of chicken roast seasoning (that has rosemary and thyme) as well, you can generally use any dry seasoning you like provided it doesn't have any sugar in it.
- OPTIONAL - Place the loin in a tray and leave uncovered in your fridge overnight (this will make it taste better due to the effect of drying out the top layer of the pork) - yes, that says uncovered.
- Preheat the oven to 250F.
- Put the pork loin into the oven and start checking the internal temperature of your pork around 1 hour into baking.
- Pull the pork loin out of the oven when it reaches 145F, the top will look almost raw. Cover with aluminum foil while you crank up your oven to broil (or as high of a temperature as possible).
- About 15 minutes before you are serving, remove the foil from the covered pork loin. Place the pork loin into the oven for 10-12 minutes. Broil until the fat crisps up and turns to a dark golden colour.
- Take the pork loin out of the oven.
- Carefully slice into pieces (because there's a lot of juices) and enjoy!
The amazing part is that the leftovers usually remain juicy and tender as long as you slowly reheat it (30% power in your microwave or low temp in your oven).


I think you can pull the meat out from the bake a little earlier than 145 degrees.
ReplyDeletePer https://www.pork.org/new-usda-guidelines-lower-pork-cooking-temperature/ the meat should be at 145 then rested for three mins.
Since we are pulling the meat out and then broiling to create the crisp pork outer layer I think the meat will be easily be over temperature.
This recipe using the reverse sear approach produces tasty, moist roast pork. After having some for dinner, I like to refrigerate the rest and cut into as thin as possible slices for sandwiches.
ReplyDeleteI have also done the "sear" in a hot cast iron frying pan with great results.