Chocolate Macarons - Macaron Mashup for Winter
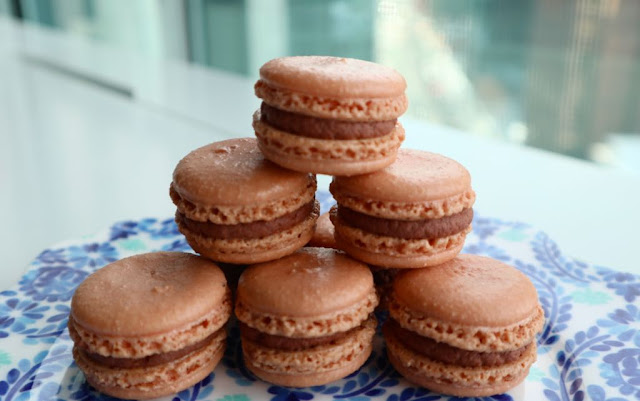
It seems to me that it has been a while since I have been able to blog about my macaron journey. The last macarons I blogged about for macaron mashup were my Apple Spice Caramel Macarons. Between packing up things in Edmonton for the move to Ottawa and everything in between, life got a tad busy! But here we are in March! Despite the crazy cold winter we happened to move in (each item arrived solidly iced), all of my kitchen equipment for making macarons thankfully arrived in one piece. I present to you the first batch of macarons that I made in our kitchen in Ottawa!
I was a tad nervous that the shells would not bake according to my expectations, as new ovens have a tendency to be finicky towards macaron shells. Happily, this was not the case. The macaron shells turned out better than expected.
Interestingly enough, this is the first time I have blogged about chocolate macarons. When I first started making macarons nearly 8 years ago, I tried to make chocolate macarons and they failed miserably. The shells were awful, no feet to speak of and all around failure. I'll have to dig up a photo from the archives to truly demonstrate how bad they were!
With this recipe in hand, you will have success in the macaron making department! Think of this as me saving you from my initial short comings in the macaron baking area. I recognize that there are quite a few steps in this macaron process, but fear not as the step by step instructions (along with the accompanying visuals) will help you attain better macaron baking results.
I've included notes and added some videos from my YouTube channel into this post to make it easier to reference.
Ingredients for Chocolate Macaron Shells
- You can make own berry sugar by processing regular sugar in a food processor until the sugar crystals are super fine. Keep any extra sugar in an air tight container for future baking.
- Keep almond meal in the fridge when you are not using it. A few hours before baking, take the almond meal out of the fridge and let it sit at room temperature.
- Egg whites need to be aged for 2 days in an airtight container. I place my egg whites in a draft free place on the kitchen counter. Keep the egg yolks in the fridge for the buttercream.
- Pre-measure all ingredients before starting. In fact, do this for any recipe!
- Kitchen tools needed: a kitchen scale, a food processor (helpful to grind the almond meal and icing sugar together), a sifter, spatula, hand mixer or stand mixer, piping bag and tip, silicon mats or parchment paper and heavy duty baking sheets. If you don't have heavy duty baking sheets, stack two baking sheets together.
- Measure all ingredients. Set up the piping bag for the macarons with the piping tip (I use a Wilton 2A or Ateco 804 piping tip). Line baking sheets with silicon mats or parchment paper.
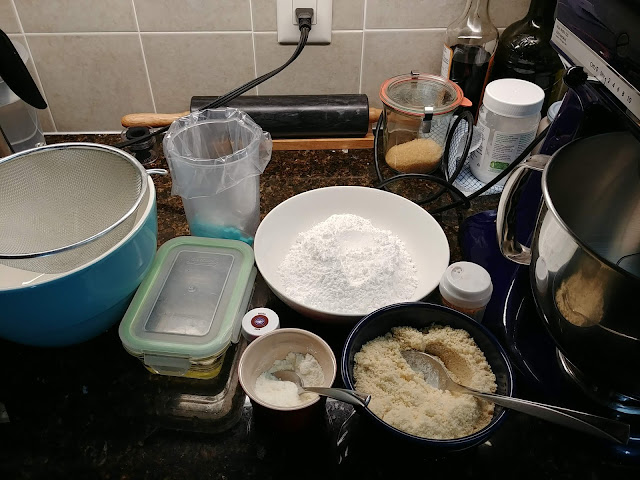
- Process the almond meal and icing sugar in a food processor until it is well mixed together. Use a spoon to occasionally move the ingredients around before processing again.
- Sift the icing sugar-almond meal mixture through a sifter to ensure there are no clumps. Place a bowl underneath.

- Measure out 100g of egg whites and place in the bowl of the stand-up mixer with the whisk attachment. Slowly whisk at low speed until little bubbles form. Once the bubbles form, add in the mixture of berry sugar and albumen. Then turn the mixer to medium speed (e.g. 4 on the Kitchen Aid).

- Continue to whisk the egg whites until "soft peaks" form. To check, stop and tilt the head of the Kitchen Aid back or stop and lift the tip of the whisk into the mixture to see if a small "bird's peak forms". If you see a peak form, then you are done whisking the egg whites. If it looks drippy/wet as you lift up, keep whisking until the "soft peaks" form. Add in the two drops of Wilton Leaf Brown food colouring with a toothpick.

- Slowly incorporate the almond meal sugar mixture by sifting 2 tablespoons at a time into the meringue. Mix in a clockwise direction. This step is probably one of the most crucial steps in making macarons - also known as the macaronage process. Mixing in a clockwise direction do the following while sifting 2 tablespoons of the almond meal-sugar mixture into the whipped egg whites.
1st part= 16 turns
2nd part = 11 turns
3rd part = 14 turns
4th part = 11 turns
5th part = 11 turns
6th part = 23 turns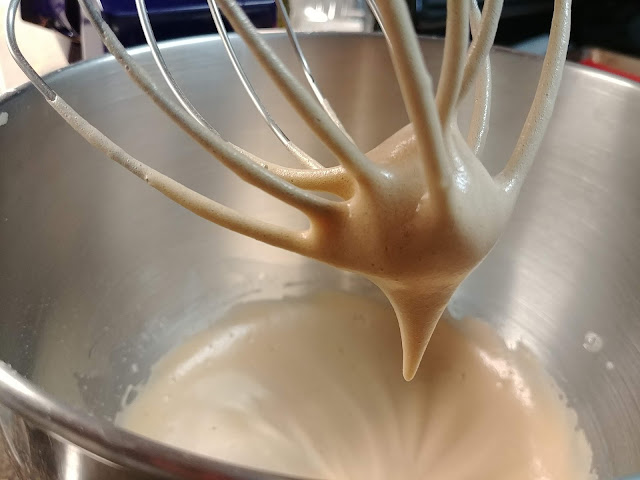
- Give a few more turns to the batter scooping through it with your spatula. Once the macaron batter feels and looks like magma (flows slowly) you are ready to transfer it to the prepared piping bag. When you transfer the macaron batter to the piping bag you are also "mixing it".
- Pipe out small circles. Hold the piping bag vertically. Pipe straight down and then do a quick circular movement to the right to finish piping one shell. I pipe across the length of my tray. I typically pipe 18-20 macaron shells per tray. How many shells you pipe on a tray will depend on how big you make each shell. Before piping the next sheet, firmly rap the tray on the counter to get rid of any air bubbles inside the shells. This is called "tamping". Use a toothpick to gently poke any bubbles.
Continue to pipe the rest of the trays. I typically pipe about 4 trays of macarons with 18-20 macarons on each one. 5 shells on the first row, then 4, then 5, then 4. For this particular video above, I ended up piping smaller macarons for each row.
Let the piped macarons sit for at least 60 minutes until a skin forms and is dry to the touch (this is an important step). - Preheat the oven to 280-290F. Allow the oven to come to the correct temperature. This may take 30 minutes. Using an oven thermometer will be helpful. Depending on your oven you may be baking anywhere from 280F to 290F. Currently I am baking each tray of my macarons at 290F for 20 minutes. Once the macarons are done baking allow the shells to cool on their tray before you gently peel them off. Lift under the mat and then push up to gently release each macaron shell. The bottoms should be nice and smooth.
At this point you can choose to place the macaron shells in an airtight container in the fridge or freezer to be filled with buttercream for another day. Otherwise, continue on with matching shells together in order to fill them with the chocolate buttercream.
Ingredients for Chocolate Buttercream
- 80g berry sugar/superfine sugar
- 25g water
- 1 whole egg (~60g)
- 1 egg yolk
- 160g soft unsalted butter (cut into cubes)
- 180g good quality dark chocolate - 64% Dark valrhona manjari
Directions for Chocolate Buttercream
- Bring sugar and water to a boil in a small pot. Heat the sugar to 250F(120C) using a candy thermometer. If it boils, clean the sides of the pan with a damp pastry brush. Try not to mix the solution, but allow the sugar solution to heat on its own.
- In another bowl or the bowl of your stand up mixer whisk the eggs and egg yolks until it lightens in colour.
- Once the hot sugar mixture reaches 250F slow down the whisking speed of the eggs, and immediately pour the hot sugar mixture into the egg mixture (do this part quickly). Increase to a higher whisking speed (8 on my KitchenAid). Continue whisking until the mixture has cooled down completely (approximately 15 minutes). It will look glossy, white and meringue like.
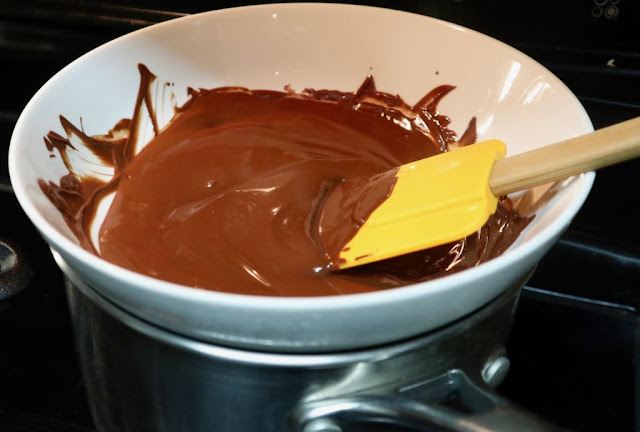
- Keep whisking the meringue until it has cooled (10-15 minutes). While the buttercream is whisking away, melt the chocolate in a heat proof bowl over a pot of boiling water. The chocolate will slowly melt. Once melted, transfer to another heat proof bowl and allow to cool.
- While the melted chocolate is cooling, in a separate bowl whisk the butter until it has thickened. It will lighten a bit in colour. Once the meringue has cooled (temperature drops down to 50F), slowly add in the whisked butter a tablespoon at a time. Continue whisking until the buttercream is smooth.

- Once the melted chocolate has adequately cooled (test by putting a finger into the chocolate. If it isn't too hot to the touch than it is good to use). You just don't want the chocolate to be too hot, otherwise it will melt your buttercream. While the buttercream is whisking slowly drizzle the cooled down melted chocolate into the buttercream.

- Set up your macaron shells so that each shell has a partner shell that matches it in size. Pipe a small mound of chocolate buttercream onto the middle of each bottom shell. Assemble the macarons by placing the tops on the macaron and gently push together until the buttercream mound flattens. Store the macarons in an airtight container in the fridge for 2 days. 2 hours before serving, bring them out of the fridge as they are best enjoyed at room temperature.

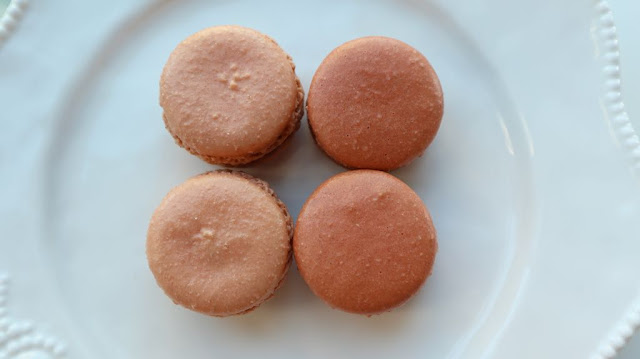 |
| First chocolate macaron batch on left, Second batch on left. |
For the pure interest of comparison and to see if I could make the macaron shells even smoother, I baked up another batch of macarons. To achieve this, I first processed the almond meal in the food processor to create a finer consistency. Then I followed everything as listed above to make the macaron shells and chocolate buttercream.
Here is a side by side profile of the macarons. As you can see, processing the almond meal to a finer consistency resulted in a better looking shell! Interestingly enough, the pied (the feet of the macaron) also appears to be more lifted and straighter.
Certainly a good first at making macarons at home in Ottawa! I am looking forward to making more macarons here in Ottawa. I am also hoping to try my hand at making different and more creative types of macarons. If you have any ideas, let me know! Also if you plan on joining me in the macaron mashup initiative please do. I am thinking the next Macaron Mashup Challenge will be for Spring! Let's do a pastel spring themed macaron for end of April!




Comments
Post a Comment
I love when my friends and readers post comments. If you do try a recipe, let me know! I would love to hear from you! You can also contact me through twitter or Facebook.
Your comment will be visible after I have the chance to see it (due to the amount of spam).