Trusty Crispy yet Chewy Oatmeal Chocolate Cookies Recipe
My Crispy yet Chewy Oatmeal Chocolate Cookies Recipe
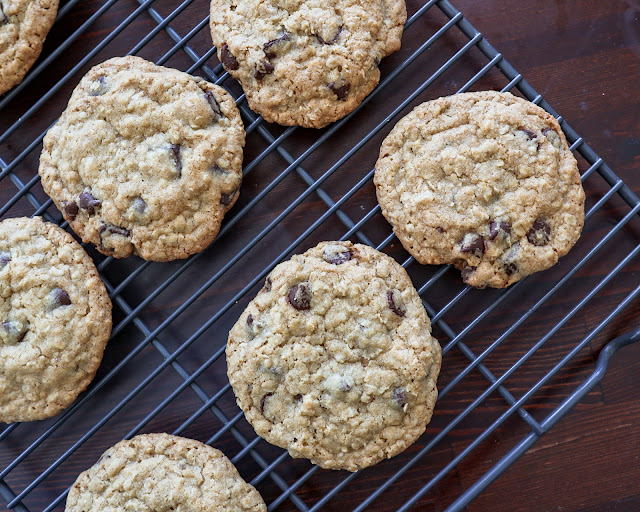
Oatmeal Cookies. For me, cookies aren't the same unless they have chocolate - thus oatmeal must always be followed with chocolate! Looking back at the blog I do have an oatmeal, chocolate chip & raisin recipe from 2010(!) and a recipe for Oatmeal & Raisin Cookies using canola oil from 2012. However, the recipe that I have been testing and creating over the past year(s) I realize is not even on the blog. This never even occurred to me until a friend asked me for my recipe recently!
So, without further ado here is my latest oatmeal and chocolate cookie recipe.
Crispy Chewy Oatmeal Chocolate Cookies
Ingredients:
- 250g (2 cups) flour
- 1 tsp baking soda
- 1/2 tsp salt (I used some flaky maldon salt but table salt works well too).
- 228g (1 cup) unsalted butter (room temperature)
- 180g (1 cup) brown sugar
- 150g (3/4 cup) granulated sugar
- 1.5 tsp vanilla extract
- 2 large eggs
- 200g (2 cups) oats (I used quick oats)
- 1.5 cups of chocolate (your choice - mixture of chocolate chip and 70% dark chocolate chunk)
Directions for Crispy Chewy Oatmeal Chocolate Cookies
- Pre-heat oven to 350F.
- Measure out all ingredients prior to baking.
- Mix together the dry ingredients of flour, baking soda and salt in a bowl. Set aside.
- In a stand-up or hand held mixer blend together the unsalted butter and both sugars. Do this for about 5 minutes until the butter & sugar mixture is nice and fluffy.
- Add eggs into the mixture, followed by the vanilla extract.
- Once wet ingredients have been incorporated, turn the mixer to a lower speed. Then, add in the mixed dry ingredients (flour, baking soda, salt).
- Scrape down the sides with a spatula as needed until all the flour is in the batter.
- Slowly add in the oats.
- Once oats are added, turn off mixer. With a spatula stir in the chocolate chips and chunks until they are all mixed into the batter.
- If batter feels wet at this point and sticky, place the batter bowl into the fridge for about 10-15 minutes. This will help dough absorb the liquid and make it easier to roll the dough into balls.
- Line 2 baking sheets with parchment paper.
- Using a tablespoon or an ice cream scoop, scoop and then roll out balls of dough between your hands.
- Place each ball of cookie dough on the cookie sheet, pressing down gently until it forms a flatter disk. Space out the dough, leaving about 1 inch from the next cookie dough and the rim of the cookie sheet.
- Depending on how big you make your cookie balls (I typically roll out about 50g of dough for each cookie) I find I end up placing 3 cookies on the top row, 2 in the middle and 3 on the bottom row with space in between.
- Bake one tray at a time at 375F for 12-13 minutes or until the edges of the cookies have started to brown.
- As cookies start to cool, transfer them to a cooling rack or tray. if you don't have one, just spread them out on a plate.
- Allow cookies to cool for a few minutes before enjoying!


Comments
Post a Comment
I love when my friends and readers post comments. If you do try a recipe, let me know! I would love to hear from you! You can also contact me through twitter or Facebook.
Your comment will be visible after I have the chance to see it (due to the amount of spam).