A Recipe for Mochi Matcha Cake
A recipe for making Mochi Matcha Cake - not too sweet and is a gluten free cake!
Recently I have a craving for mochi. The best way to describe mochi, is that it is a rice flour cake. It is made from glutinous rice flour. Glutinous rice flour is made from grinding a type of sticky rice into a fine powder and the word "glutinous" describes the texture (sticky) versus the content of it. So these mochi cakes are naturally gluten free (no wheat ingredients) and the rice flour gives the mochi cakes a nice bounce to it. In fact, glutinous rice flour is a good flour to mix with other gluten free recipes as it adds chewiness to your recipe where other gluten free flours often lack.
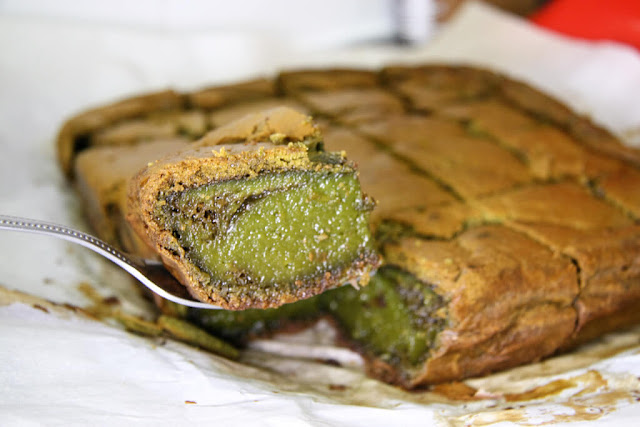
I received some matcha powder from Natur'el Tea and decided that I wanted to give their matcha a spin and try making mochi cake with them. As you can see the mochi cake looks like a brownie on the outside but on the inside is green (due to the matcha) and has a gooey centre.

Ingredients for Matcha Mochi Cake
 |
| Ingredients for making Matcha Mochi Cake |
- 1 1/4 cups of sugar
- 2 1/4 cups of glutinous rice flour (one in the green bag; not sweet rice flour)
- 1/2 tablespoon baking soda
- 2 tablespoons of matcha powder
- 1 can of coconut milk
- 1 can of evaporated milk
- 1/4 cup of canola oil
- 2 large eggs
- 1/2 tablespoon vanilla extract
Directions for making the Matcha Mochi Cake
- Pre-heat oven to 375F. Add sugar, glutinous rice flour and baking soda into a mixing bowl or stand-up mixer.

- Add matcha powder into the dry ingredients and stir well.

- In a separate bowl mix together the can of coconut milk, evaporated milk, canola oil, eggs and vanilla extract. Then, slowly stir the wet ingredients into the dry ingredients.

- Line a 8"square baking dish with parchment paper. Leave about 1 inch to over-hang on all sides. Slowly pour your matcha mochi mixture into the square dish. It will look like it almost overflows but the pan with the parchment paper should be big enough!
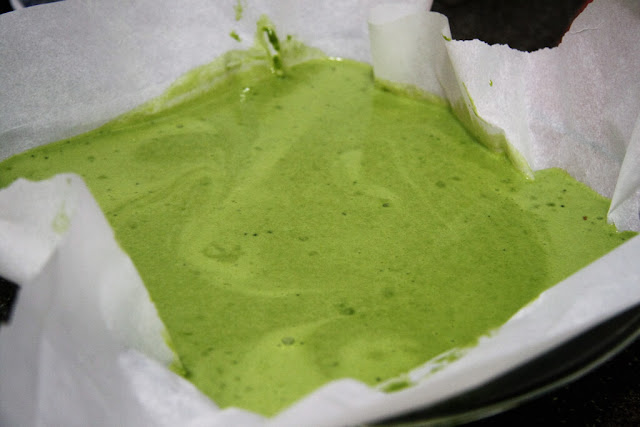
- Bake at 375F for 70-75 minutes. The cake is done when the cake jiggles slightly when you gently shake the pan. The cake will rise as it bakes and then it will crack (that is okay). The top should have a slight brownish crust. Allow the cake to cool completely in the pan.

- After 30 minutes the cake should have cooled enough to be cut. Gently lift the cake out using the parchment paper (it will be heavier than it looks). Use a sharp knife to cut the mochi cake into 16 squares. Ensure you cut all the way down as the mochi is quite sticky. The parchment paper should peel away easily.
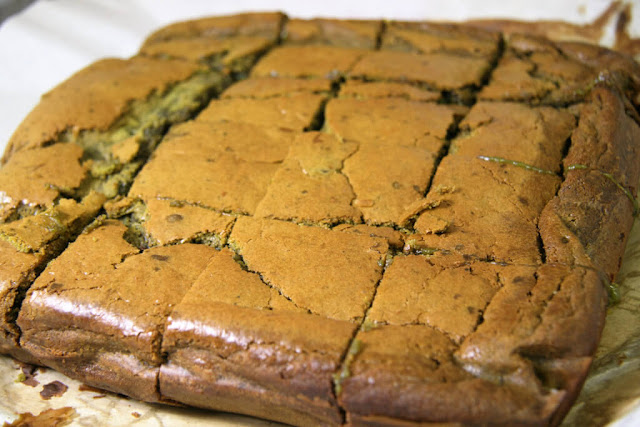
These mochi matcha cakes visually look like a brownie but as you bite in there is a matcha green tea flavour instead of chocolate and a gooey sticky centre. I love how this recipe is super simple to make and put together. It's probably easier than making brownies as there is no butter to cream.
They are ready to eat right away. Store them in an air tight container but beware that these mochi cakes need to be eaten within a few days. They cannot be placed in the fridge as they will dry up and harden. So definitely share them with your friends, neighbours and co-workers!

Hi! Can you please clarify how big a “can” is (in ounces) for the coconut milk and evaporated milk?
ReplyDeleteSo sorry Tammy for the late reply! One can of coconut milk would be about 400 ml or 14 Oz depending on what brand you buy. Same as evaporated milk. So like one can of the carnation milk brand or similar. Hope that helps!
ReplyDeleteHi, thanks for this recipe, I've been looking for a more "cakey" mochi cake with more of a crust and your pictures have me excited to try this recipe! Which brand of rice flour do you use that's in a green bag, is it the Erawan Elephant brand? Thanks!
ReplyDeleteYes green bag! Elephant
ReplyDeleteGreat thanks will do!
ReplyDelete