Step by Step Strawberry Macarons Recipe

Strawberry Macaron Shells (30-40 macarons or 80 shells depending on size)
Ingredients- 100g Aged Egg Whites (2-3 days in an airtight container at room temperature.)
- 225g Powdered Sugar (icing sugar)
- 125g Almond Meal
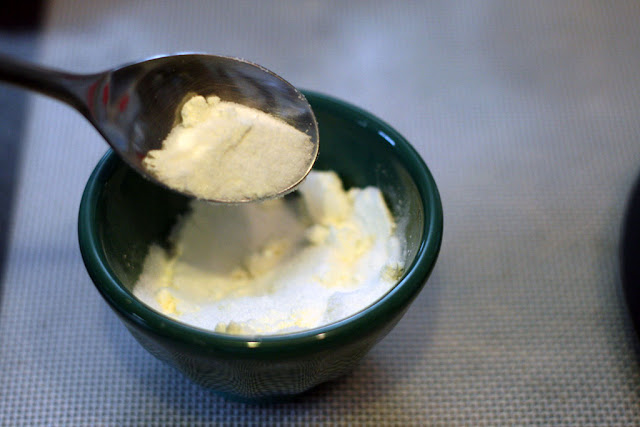
- 5g Dehydrated Egg White Powder (Also known as albumen)
- 28g Extra Fine Sugar (I often make my own by processing granulated sugar in the food processor.)
- Red Gel food colouring (Using gel food colouring is better as it does not add any extra liquid to the macarons.)

Directions for Strawberry Macaron Shells
- Measure all your ingredients with a scale. This is important as macarons need the correct ratios for them to turn out.

- Mix the albumen and extra fine sugar together in a bowl and set aside.
- Process the almond meal and icing sugar together in a food processor, then sift into a bowl. Try to ensure that most of the almond meal is ground up and there are no large chunks. The finer you grind the almond meal and icing sugar; the smoother the tops of your macaron shells.

- Place the whisk attachment onto a stand-up mixer. Place the pre-measured egg whites into the stand and start whisking at a low speed (2 on my Kitchen Aid mixer).

- Once the egg whites are foamy looking (mousse-like) add in the albumen and granulated sugar mixer. Whisk on low speed until just incorporated. Then, using a toothpick add 2 drops of food colouring into the mixture (I am using the Red coloured Wilton gel).


- Increase the speed of the whisk (4 on my Kitchen Aid), and whisk the egg whites until "soft peaks" form. To test if the meringue is at the correct stage, do a quick check by stopping the mixer and checking the firmness of the peak. There should be a small peak that forms at the end of the whisk. Ensure that the meringue is not too stiff or too foamy. It usually takes about 2 minutes to reach this stage called the "meringue" stage of macaron making. (Video of whipping the egg whites here).

- Take the mixing bowl off the stand-up mixer. Taking 2 tablespoons at a time, slowly sift the almond meal sugar mixture into the meringue. I have found sifting helps prevent any clumps from forming in the macaron batter. I do find that mixing in a clock-wise manner with a certain number of turns each time helps to make the best macaron shells. The batter should look and feel like magma (flows slowly). This step is known as the macaronage process. Take a look at my macaronage video for help. If you have small bits of almond meal left over at the end of the sifting, that is okay too. I usually mix the bits back into the sifted almond meal icing sugar mixture.

 Beyond Umami's Macaronage Mixing Guide (going clock-wise)1st part = 16 turns2nd part = 11 turns3rd part = 14 turns4th part = 11 turns5th part = 11 turns6th part = 23 turns
- Set up a piping bag into a tall upright container. This will help you transfer the macaron batter into the piping bag easier.

- Prepare for the piping of the macaron shells by lining either silicon mats or parchment paper onto thicker baking sheets. Thicker baking sheets will help prevent the macaron shells from rising too quickly. Pipe down into the tray and then a quick twist to the right to finish piping a macaron shell. I usually pipe 20-30 macaron shells (depending on size) per baking sheet.

- Firmly rap the tray on the counter to get rid of any bubbles in the shells. Then, use a toothpick to pop any air bubbles on the surface of the shells. See video below for an example.


- Allow the macaron shells to rest for 60 minutes until a skin forms on the top of the shell. This is a change from my previous recipe as I have found that resting the shells for at least 60 minutes helps make the shells stronger. The resting times for your macarons may change depending on humidity. Macarons often need to rest longer before baking for more humid environments. Bake the macarons at 280F for 19 minutes (I am not turning the trays in the oven as I did previously. Only turn if you find that the macarons are not baking evenly). Macarons can bake at anywhere from a range of 250F - 295F. I also have found that it is helpful to keep track of baking temperatures in a book if the baking temperature that I am using doesn't work for you.


Strawberry Buttercream Recipe
- 80g castor (caster) sugar (superfine sugar)
- 25g water
- 1 whole egg (~60g)
- 1 egg yolk
- 180g soft unsalted butter (cut into cubes)
- 2 tbsp freeze dried strawberries


- Bring sugar and water to a boil in a small pot. Heat the sugar to 250F(120C) using a candy thermometer. If it boils, clean the sides of the pan with a damp pastry brush. Try not to mix the solution, but allow it to heat on its own.

- In another bowl or the bowl of your Kitchen Aid whisk the eggs and egg yolks until it lightens in colour.

- Once the hot sugar mixture reaches 250F, turn the whisking egg mixture down to stir, and immediately pour the hot sugar mixture into the whisking egg mixture. Increase the whisking speed to a higher whisking speed (8 on my Kitchenaid). Continue whisking until the mixture has cooled down completely (approximately 10-15 minutes). It will start to look glossy and meringue like.

- Keep whisking the meringue until it has cooled. Meanwhile, cream then whisk the butter until it has thickened. It will lighten a bit in colour. Once the egg mixture-meringue has cooled, add the butter. Add the whisked butter slowly into the meringue.


- Continue whisking until the buttercream is smooth. It may curdle slightly but this is okay. Keep whisking and the buttercream will come back together. Add in 2 tablespoons of freeze dried strawberry powder, and continue to whisk the buttercream to incorporate, Take a look at this video for making the buttercream (it's for a different buttercream, but will still give you an idea of what it should look like).

- Once the strawberry buttercream has come together, immediately transfer the buttercream into a piping bag fitted with a nozzle (Here's a quick visual tutorial on piping bag basics).

- Match macaron shells by size, then pipe a small mound of strawberry buttercream onto each half shell.

- To assemble, place the top onto the strawberry macaron by placing the top shell onto of the strawberry buttercream. Gently push down until the buttercream almost reaches the edge of the shell. Then, gently twist the top shell to the right. Macarons need to rest in the fridge for 2 days before eating. Let them come to room temperature (about 2 hours out of the fridge) before serving and enjoying.


If you are looking for more tutorials for making macarons on my blog check out the following:
Of course, sometimes Macaron Baking just doesn't go right! It happens to me too! Read my Macawrong-When Macaron Baking Doesn't Go Right for more tips and tricks of why those mistakes occur!
If you want to leave a comment on this post, please do so! I have also changed the settings so you can comment as a guest! Just click on "name", more boxes with appear. On the very bottom left corner there is a checkbox that says "I'd rather post as a guest". Then, you can comment without having to use the Disqus part!

Loved this post! So helpful and encouraging ... I'm going to try again real soon xo
ReplyDeleteyah!! glad that you found this helpful! keep on making them!! also that macaron t is soo cute!
ReplyDelete